

Installation guide
Add a facial recognition reader
Prepare the reader and add it to your company to synchronize employees at its center and view its events.
Before you start
- Sign in to the right company as an owner, administrator, or integration technician with current access.
- Make sure there is an active center and an available reader slot in your plan.
- Have access to the reader’s web configuration. You will identify its ISUP ID and choose an ISUP key, then use both in Workforce.
- To synchronize employees, assign active employees to the reader’s center and add their photos in Workforce.
Step by step
1. Configure the reader
Before adding the reader in Workforce, open its web interface and complete these steps. Select an image to view it at full size.
Screens and option names can differ by firmware. These screenshots show a DS-K1T341AMF reader running firmware V3.2.30 build 220311.
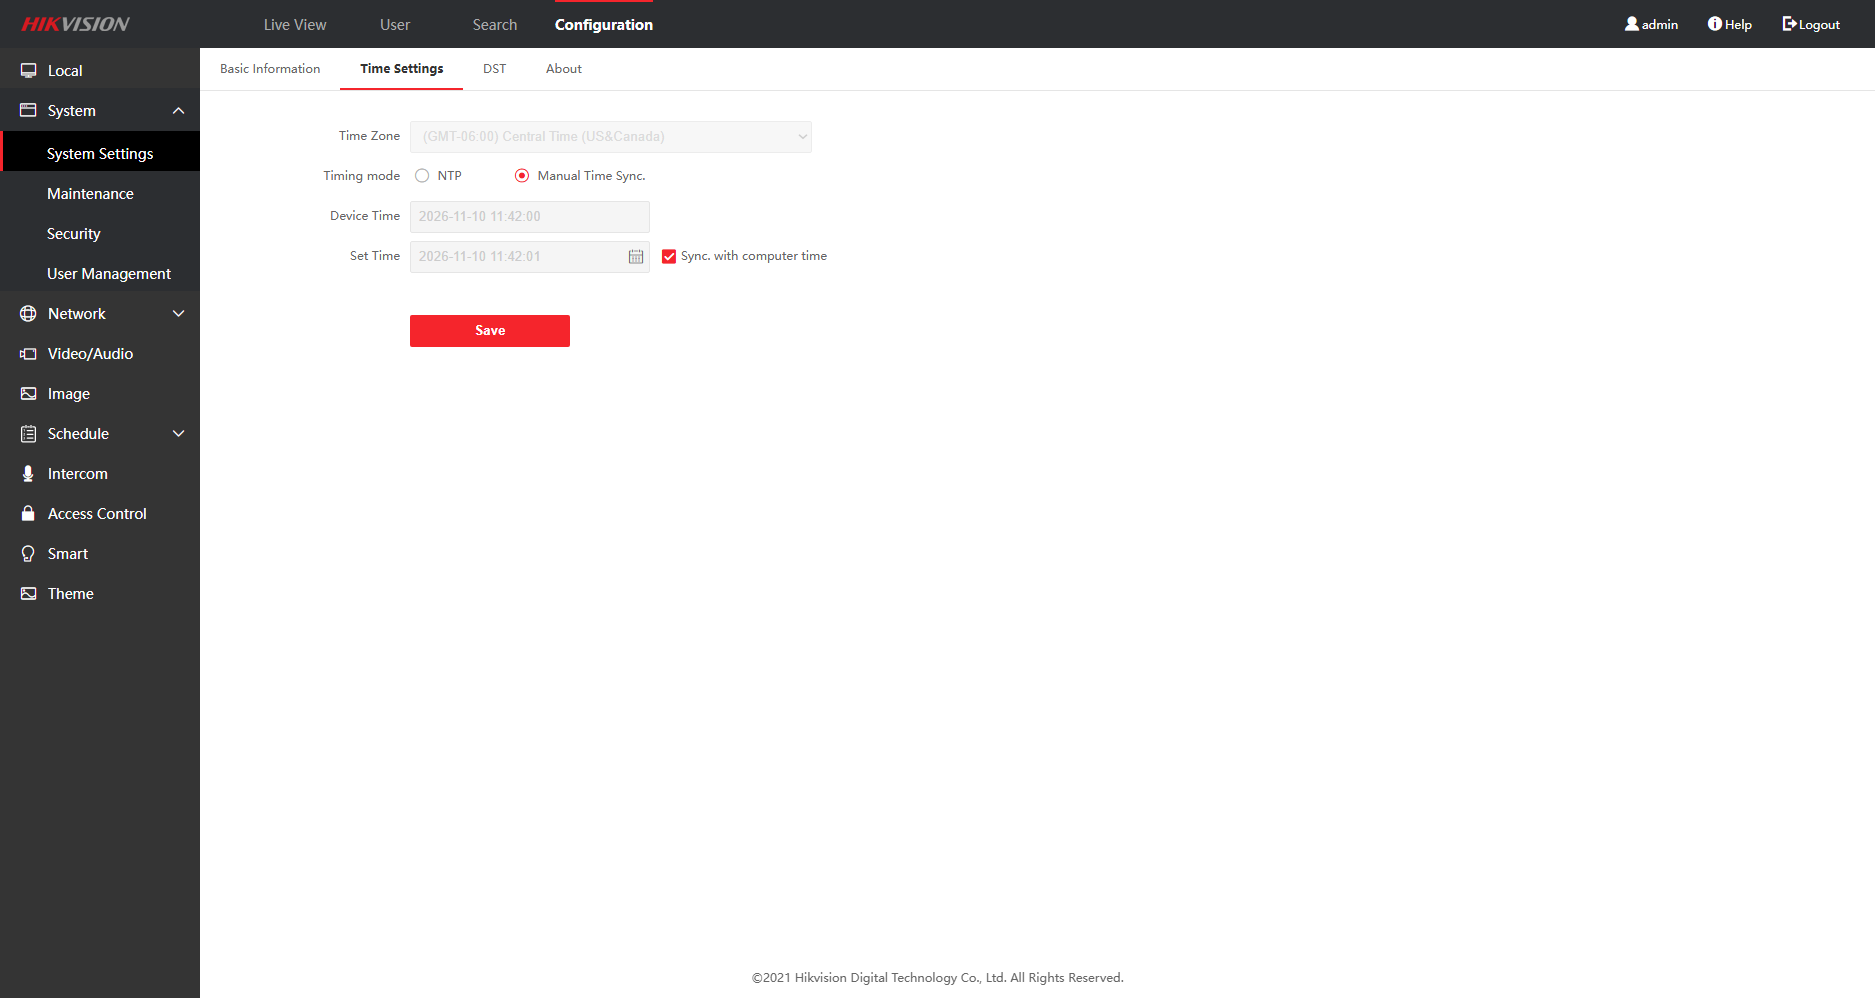
1. Set the time
Check that your computer’s date and time are correct. On the reader, open Configuration → System → System Settings → Time Settings, choose Manual Time Sync., select Sync. with computer time, and select Save.
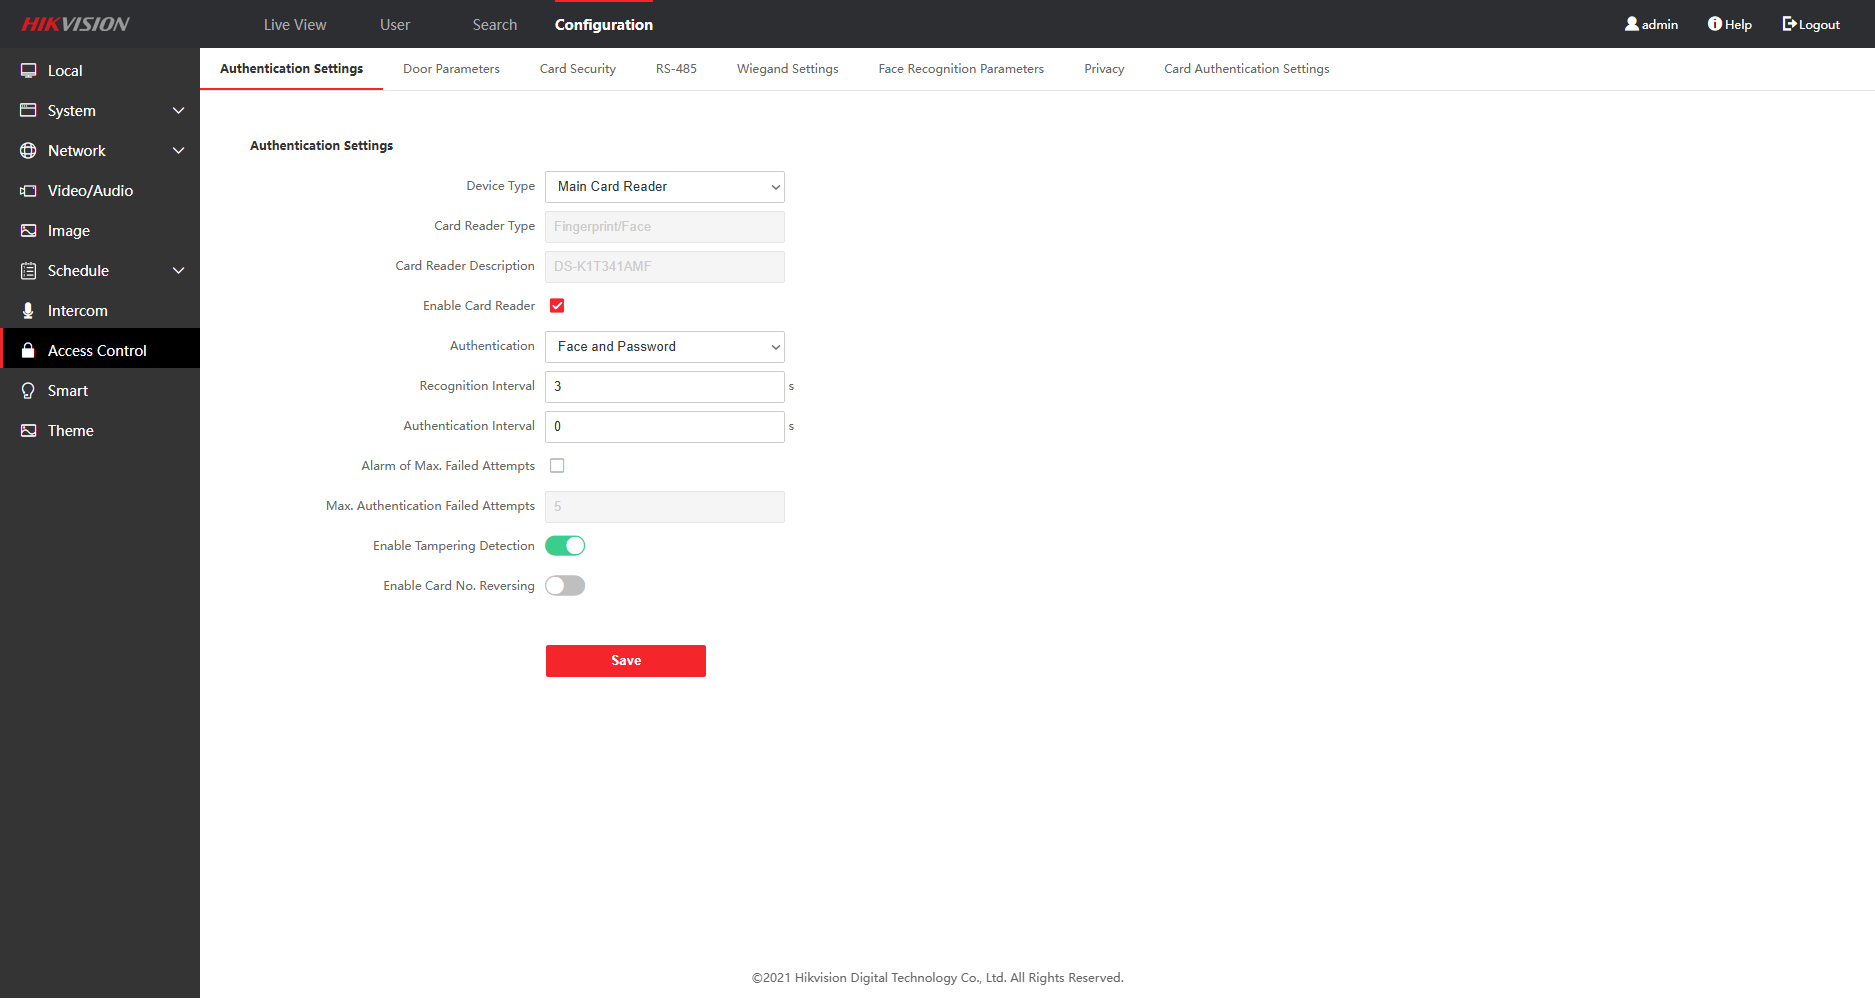
2. Set face and password authentication
Open Configuration → Access Control → Authentication Settings. Set Authentication to Face and Password, then select Save.
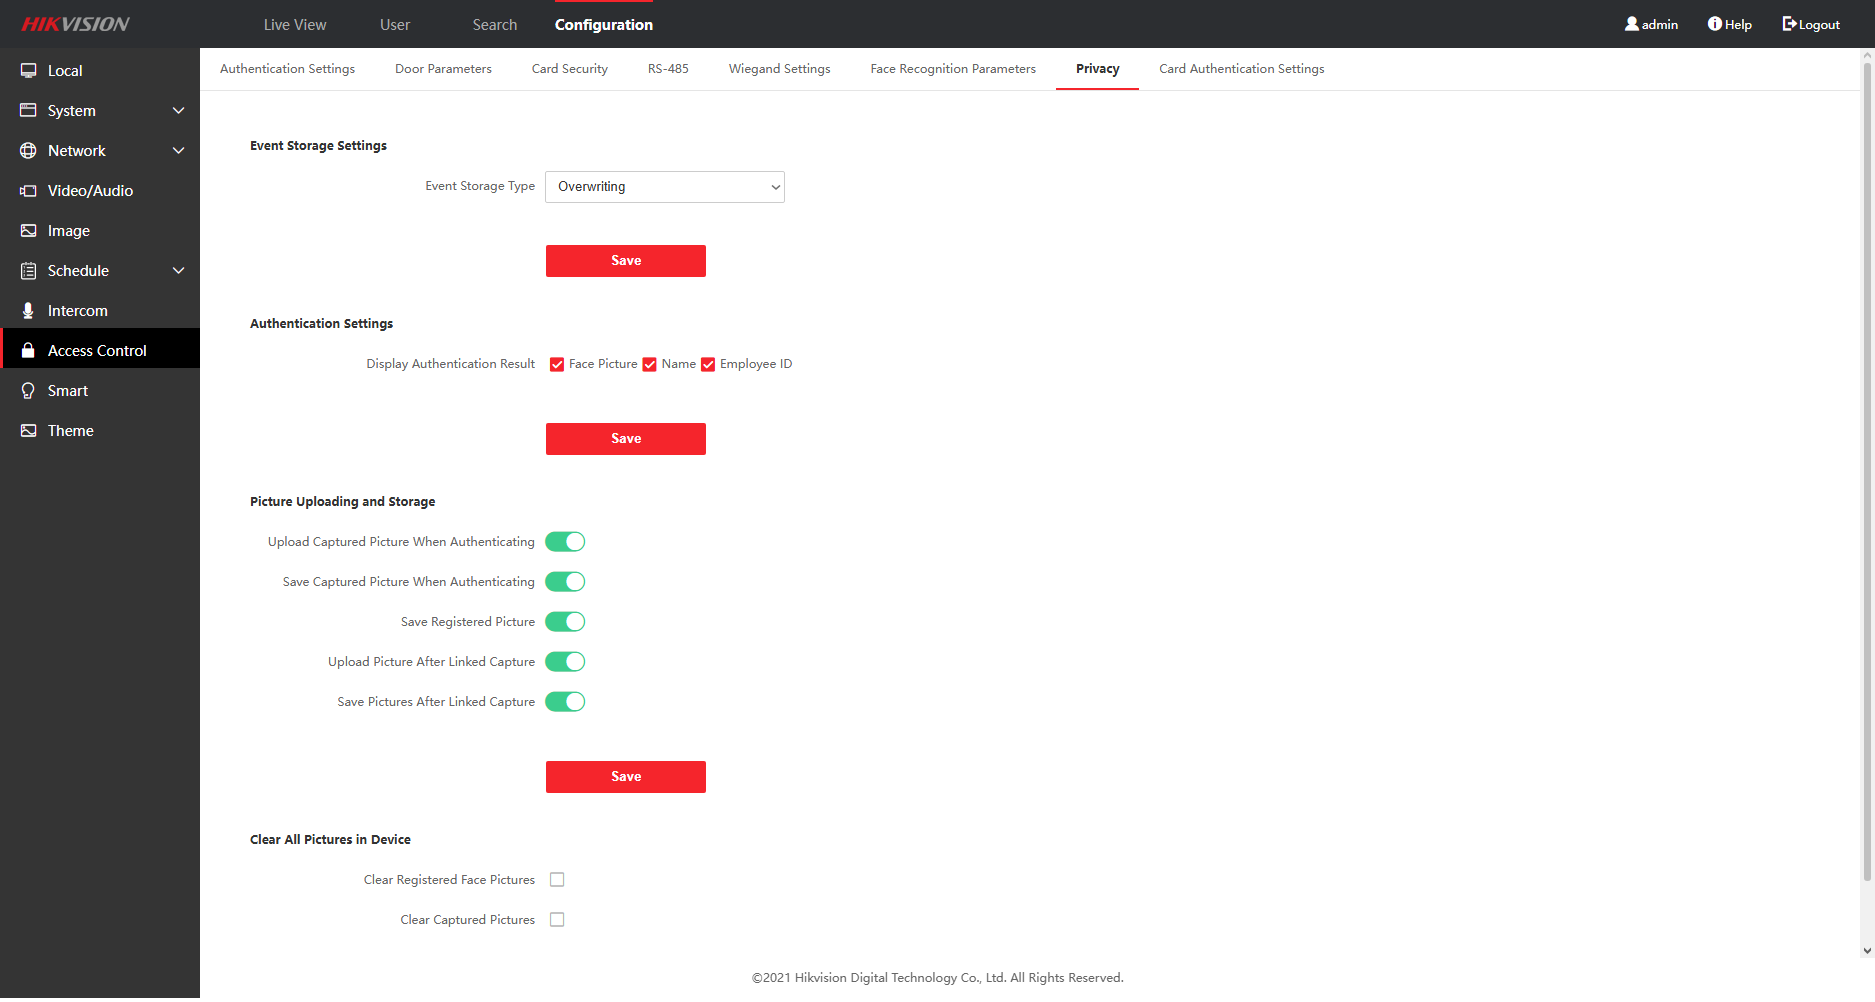
3. Enable check-in pictures
Open Configuration → Access Control → Privacy. Under Picture Uploading and Storage, enable Upload Captured Picture When Authenticating and Save Captured Picture When Authenticating. Select the Save button in that section.
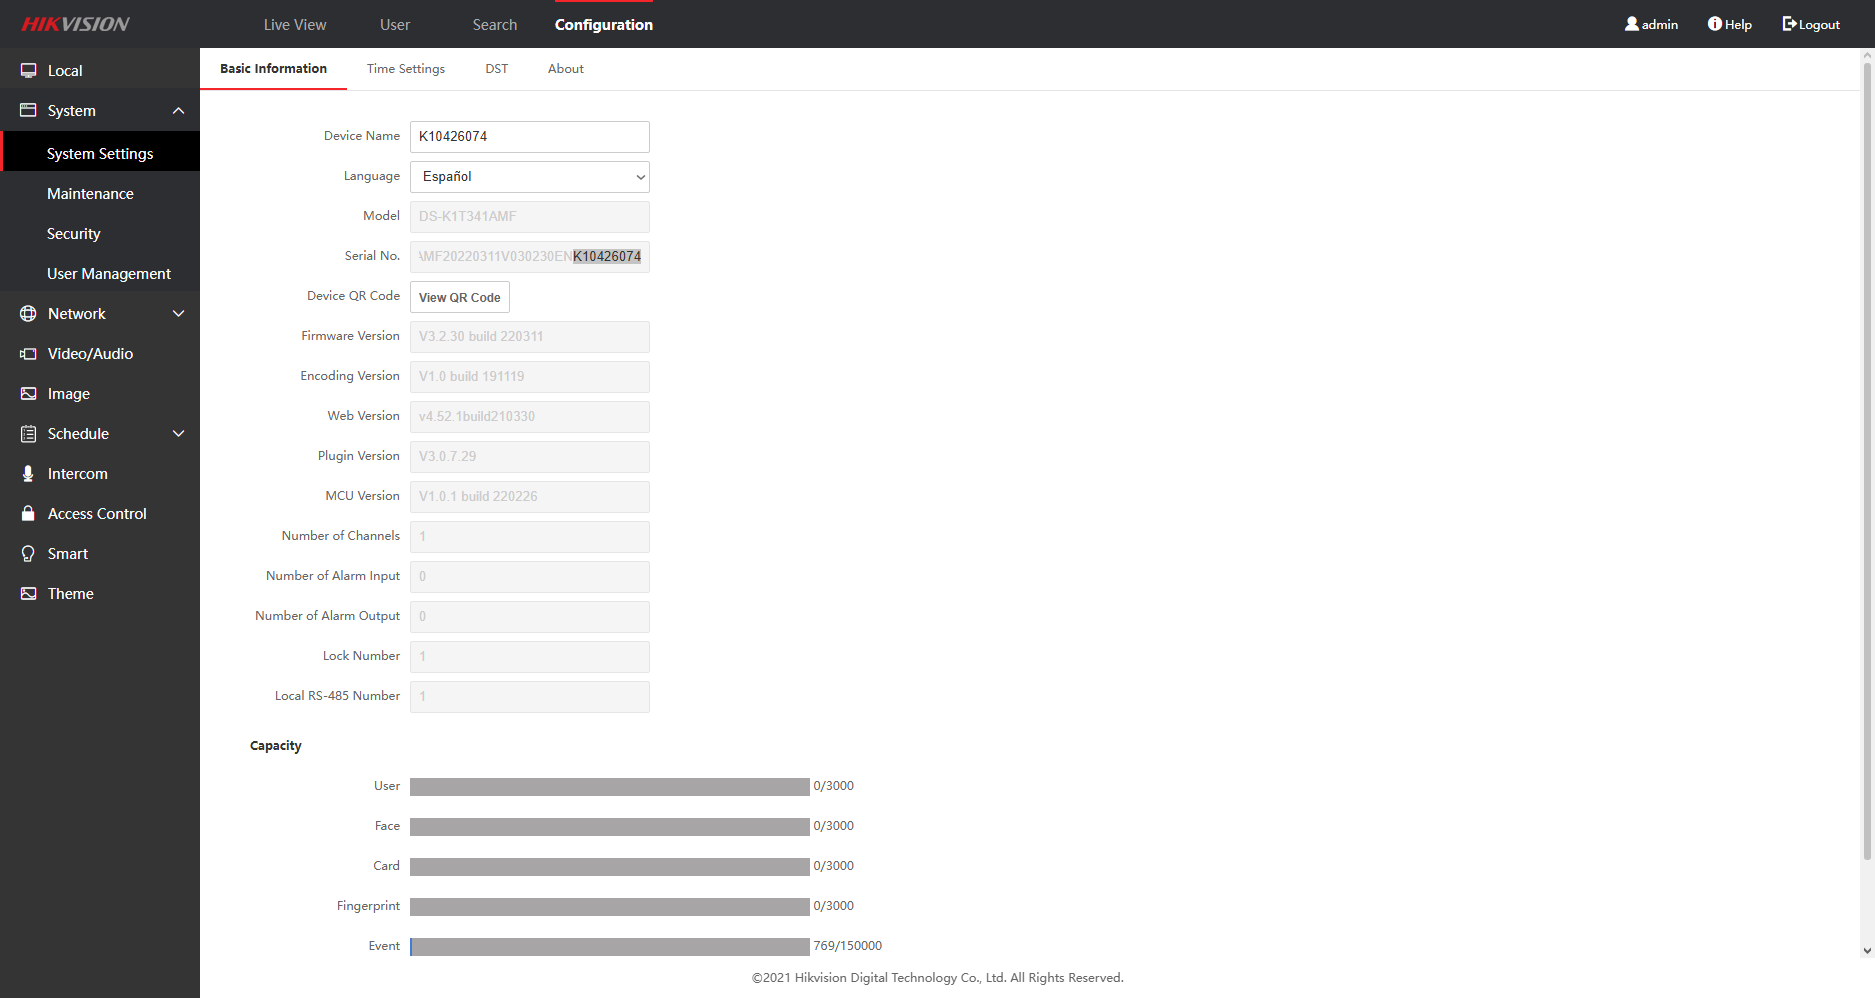
4. Find the short serial and configure ISUP
Open Configuration → System → System Settings → Basic Information. Find Serial No. and take its last nine characters; this short serial will be your device ID.
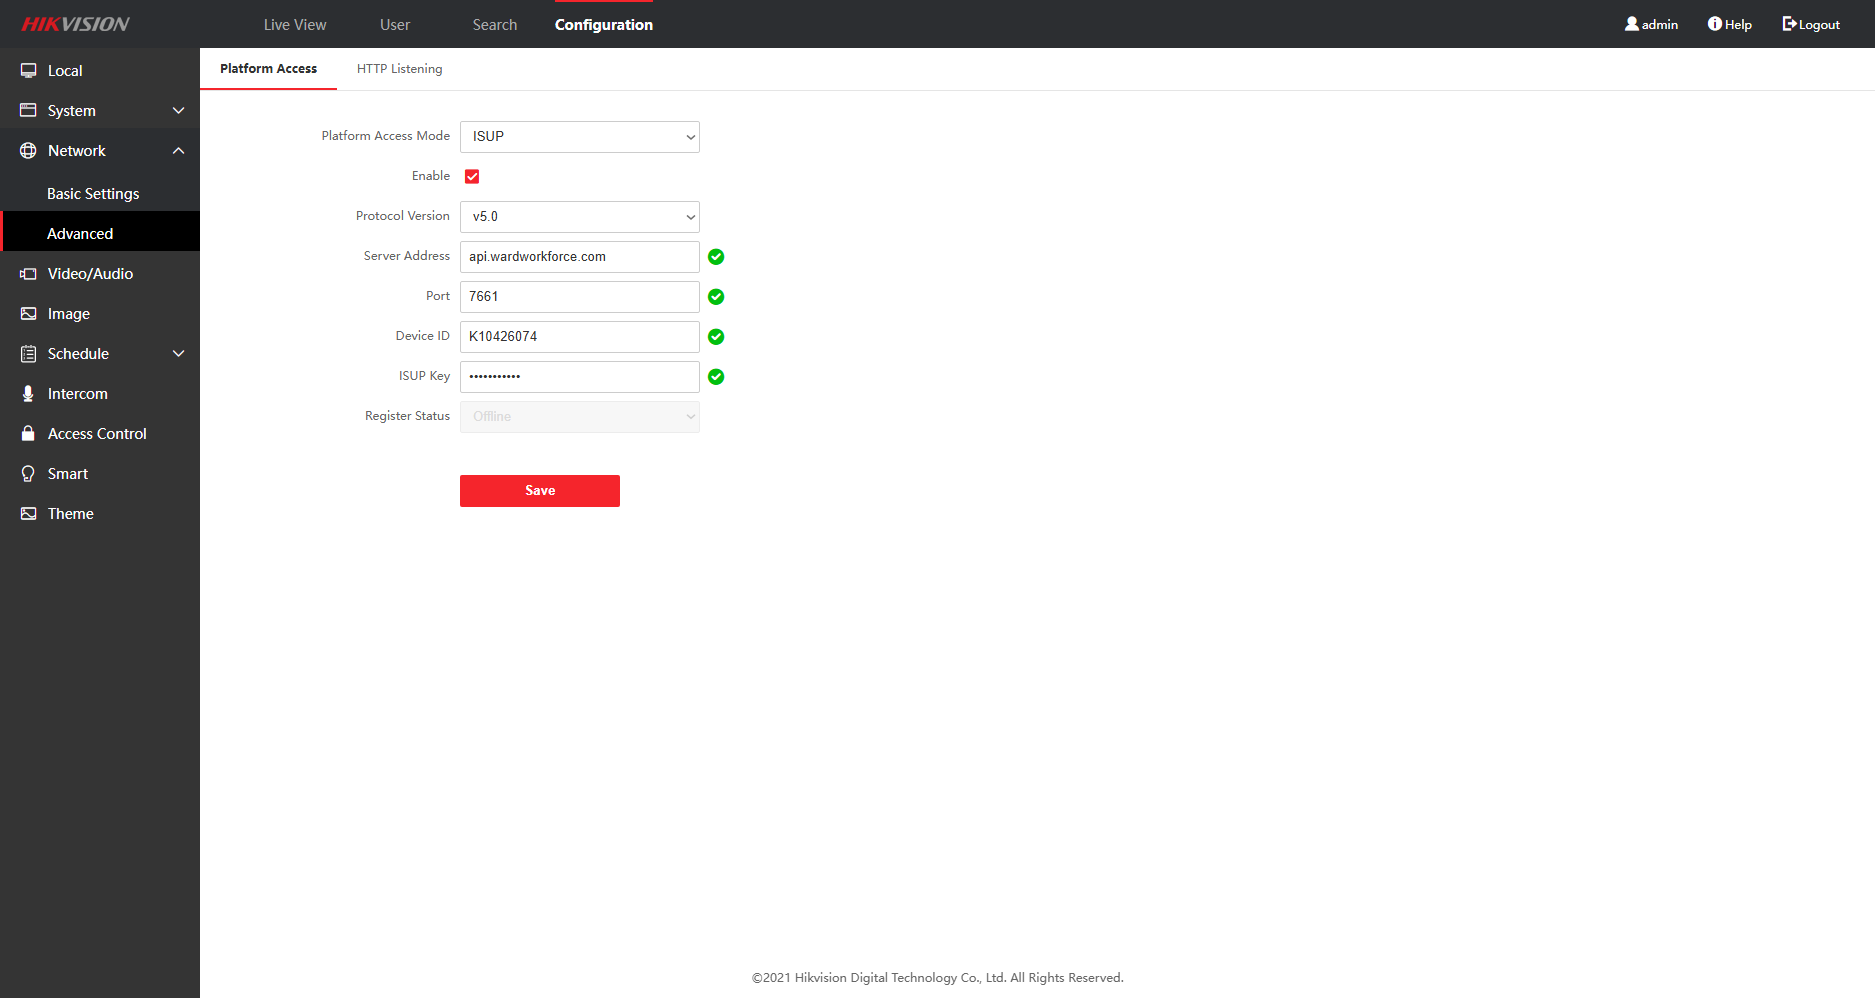
Next, open Configuration → Network → Advanced → Platform Access and complete the fields:
- Platform Access Mode: ISUP.
- Enable: select the checkbox.
- Protocol Version: v5.0.
- Server Address: api.wardworkforce.com.
- Port: 7661.
- Device ID: the nine characters identified in the previous step.
- ISUP Key: choose a key. You must enter exactly the same key when adding the reader in Workforce.
Select Save. Keep the ID and key secure for the next section.
Step by step
2. Add the reader in Workforce
The screenshots show the Spanish interface with a sample company and data. The appearance may vary with your screen and account permissions.
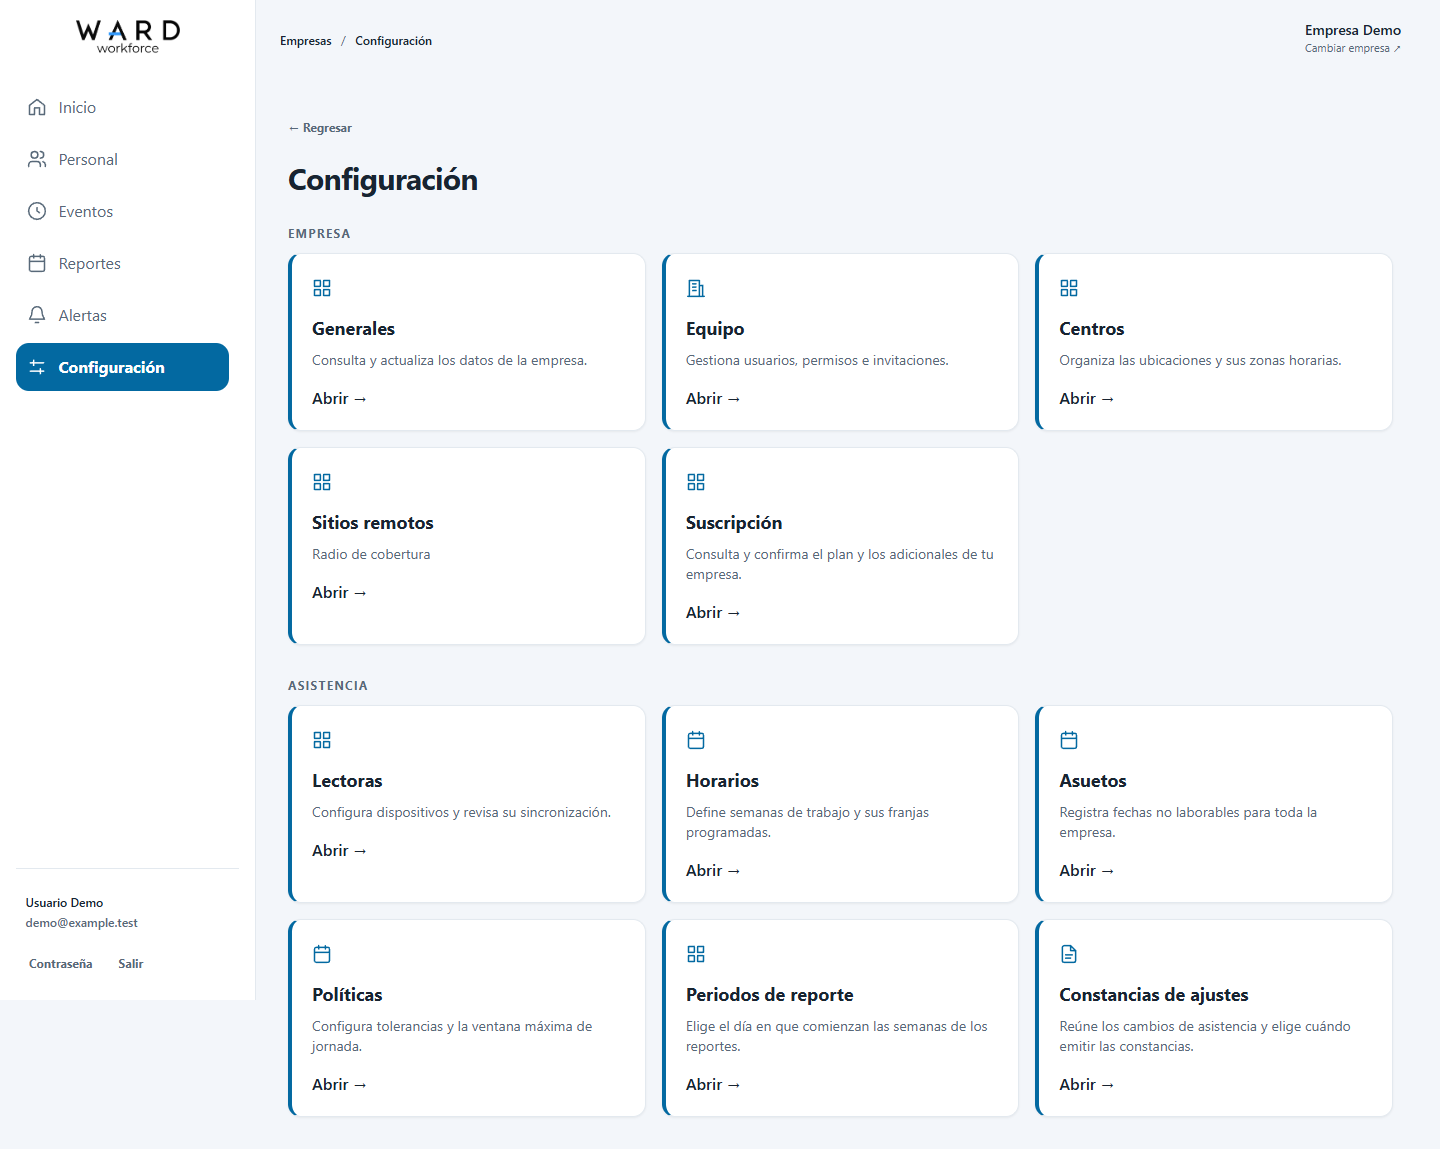
1. Open Settings
Enter your company and select Settings in the menu. Then open Readers.
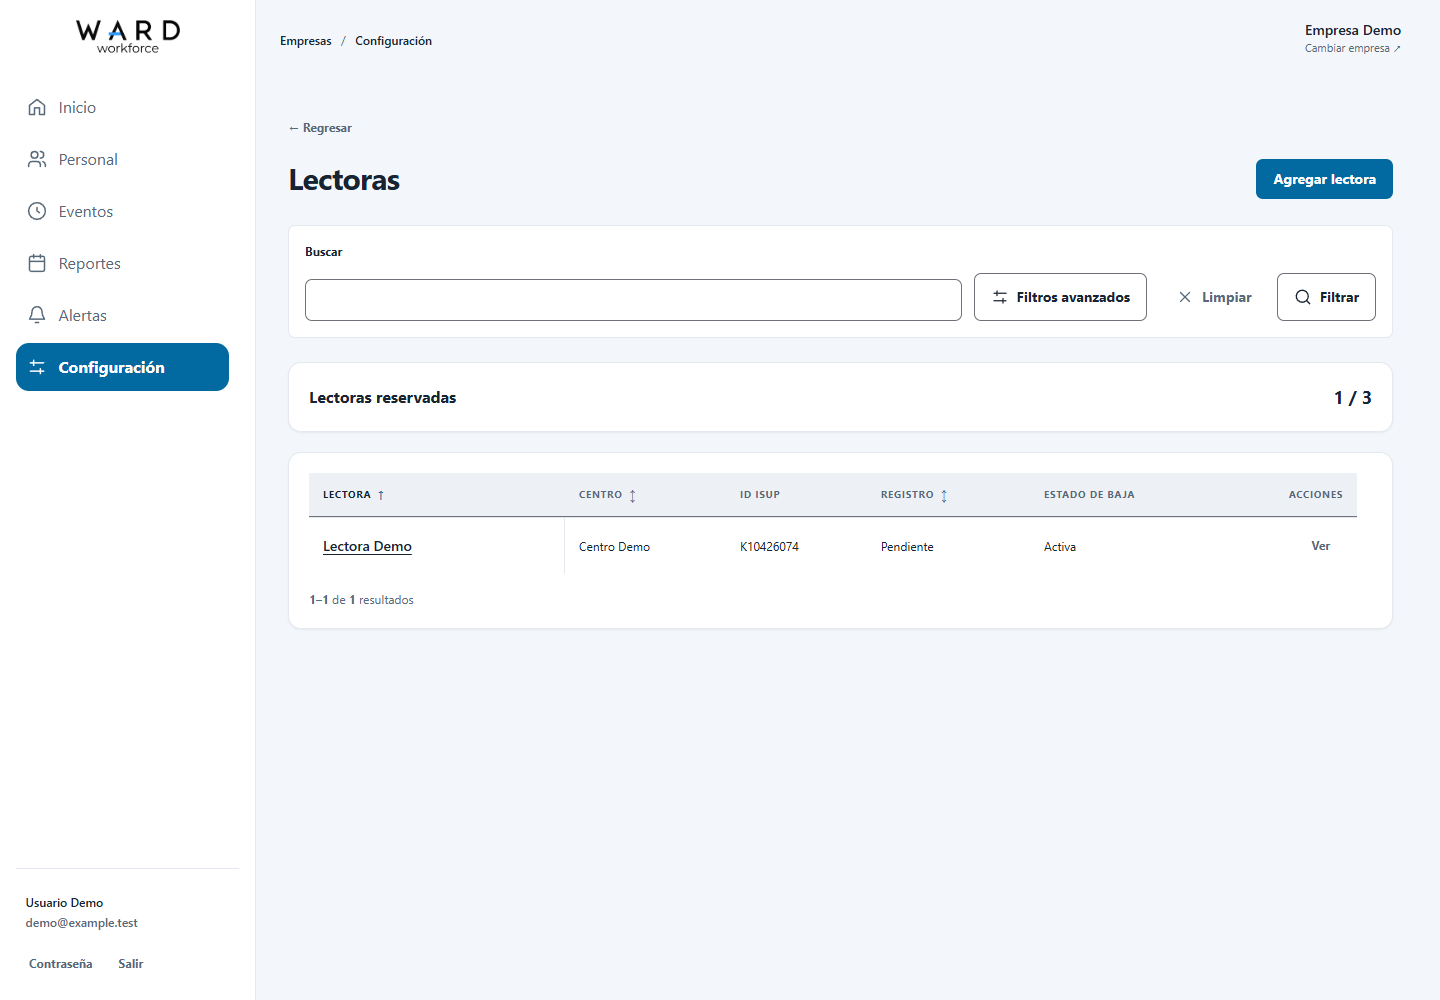
2. Select Add reader
In the reader list, select Add reader. If there are no readers yet, the action appears in the page message.
3. Enter the details and save
Complete the fields and select Save:
- Reader name: choose a name that identifies its location, for example, “Lectora Demo”.
- Center: select the active center it belongs to.
- Device ISUP ID: enter the same Device ID configured on the reader.
- ISUP key: enter the same key configured on the reader. It is protected when saved and will not be shown again.
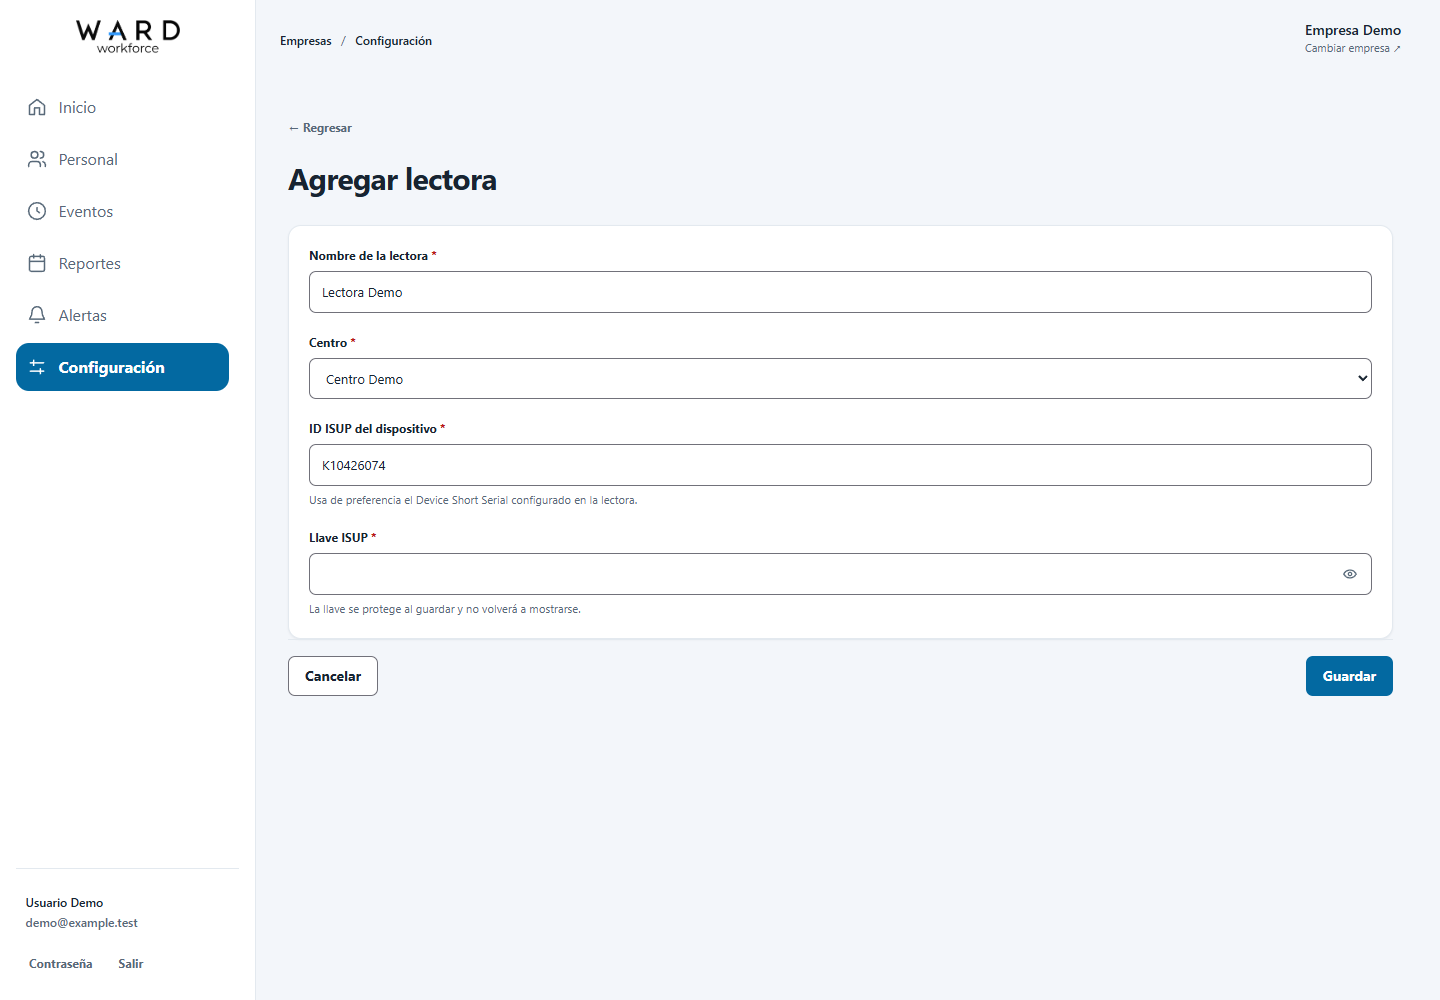
Saving requests registration; it does not confirm the connection, configuration or event reception.
4. Review the reader status
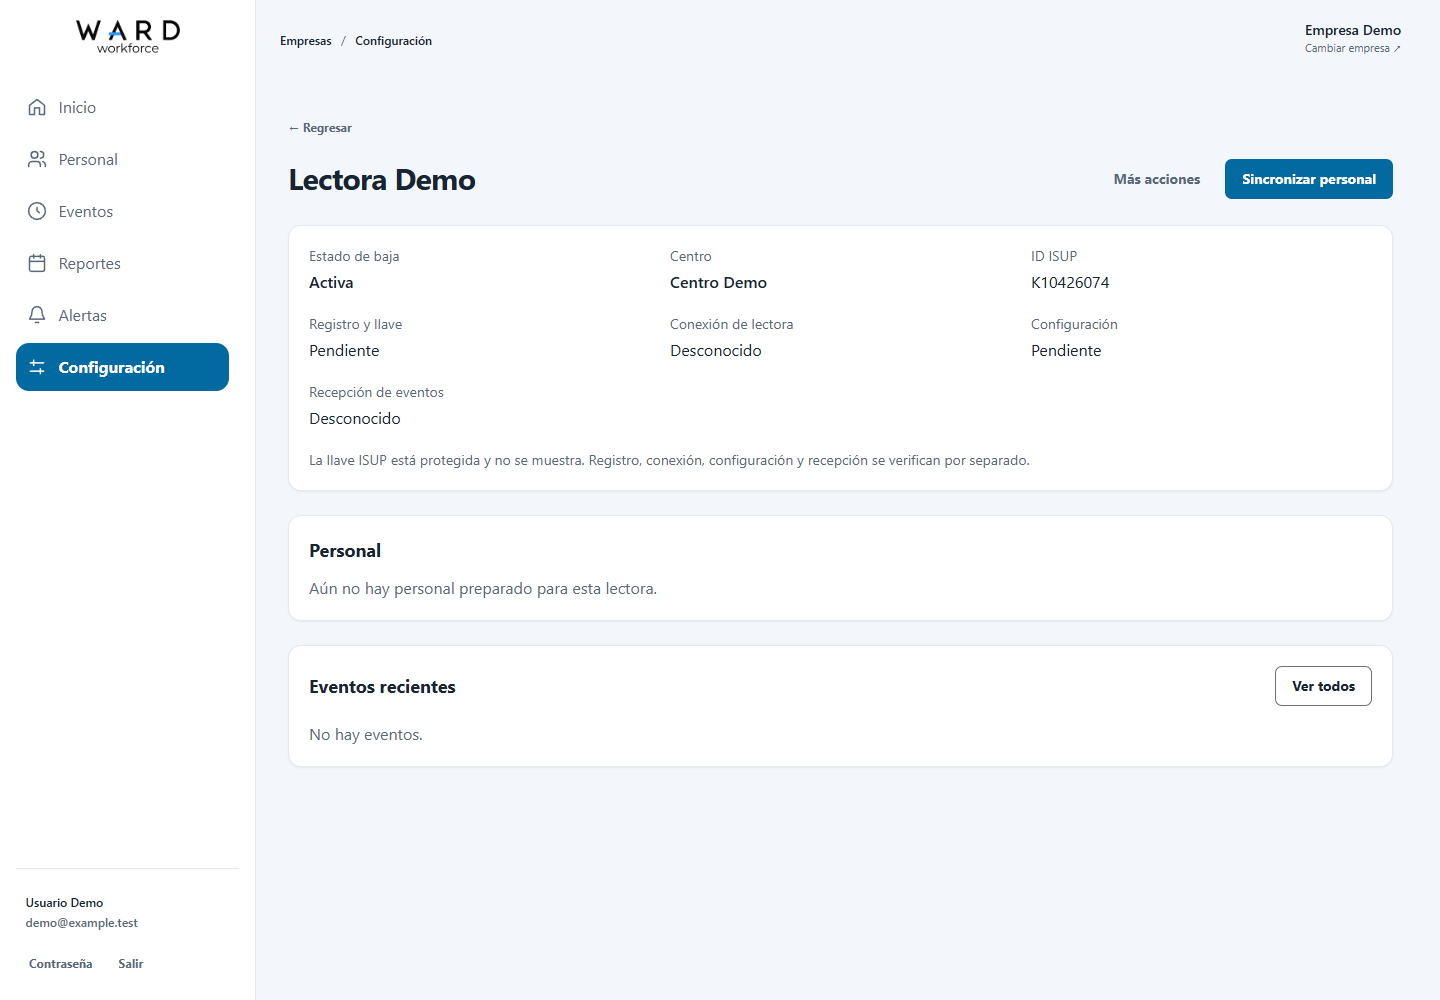
On the details page, review Registration and key, Reader connection, Configuration and Event reception. These are independent stages and may change at different times.
Event reception remains Unknown until Workforce receives a real event from the reader. Add and synchronize employees, then make a test check to verify reception.
To request another check, select More actions → Check reader. If an attention message appears, follow the instructions on the page or contact support.
5. Sync personnel
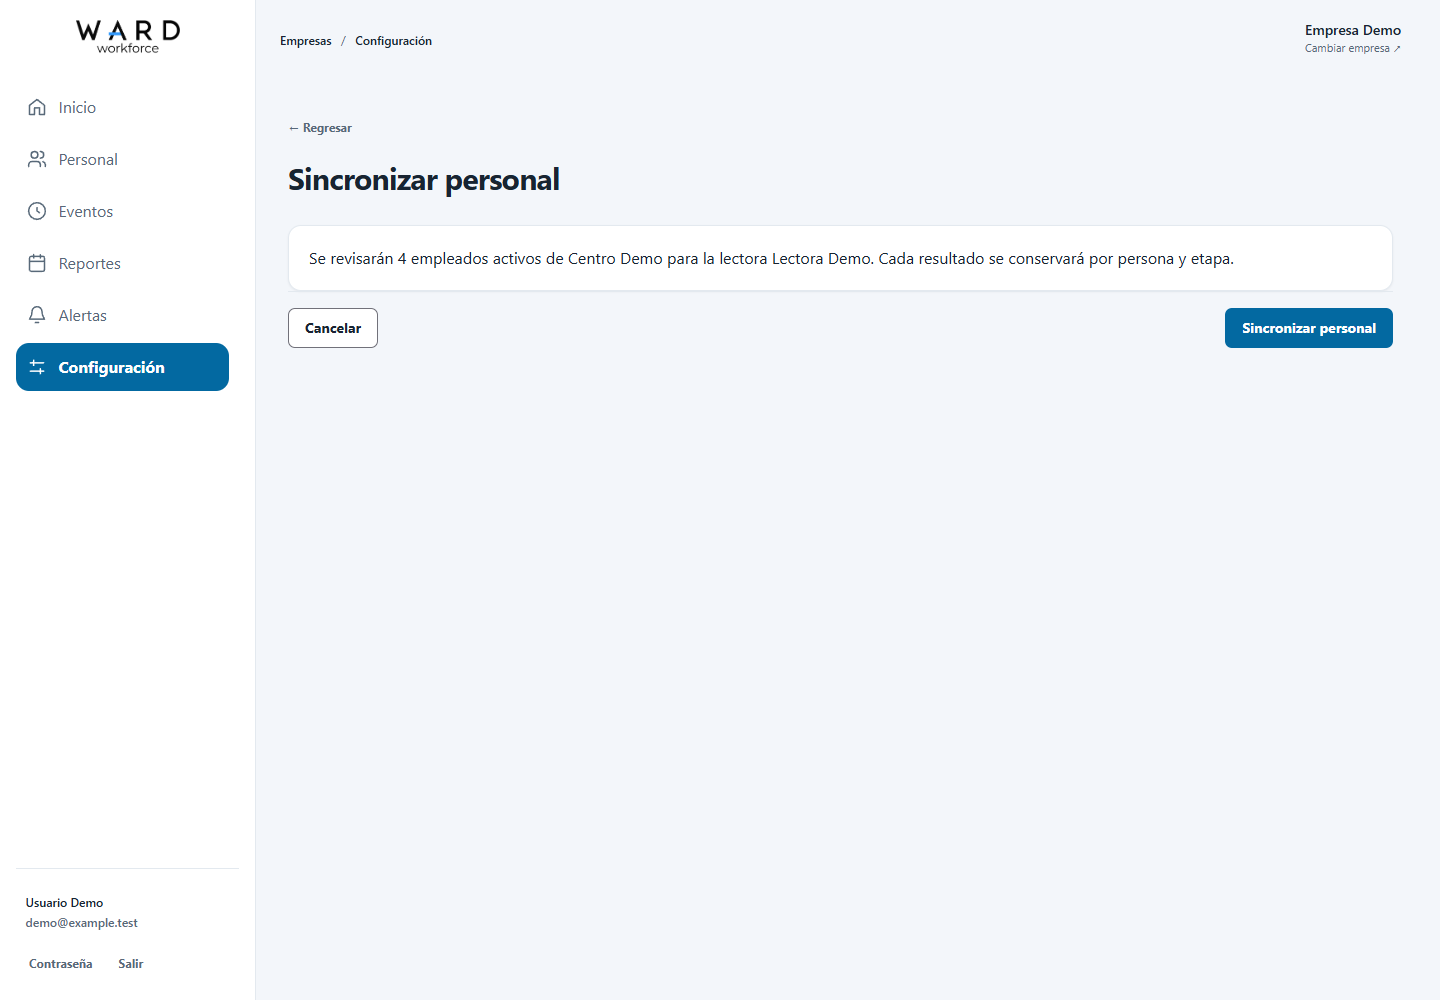
On the details page, select Sync personnel. Review the number of active employees at the center and confirm with the same button. Workforce will schedule the review; then check each person’s result on the reader page.
3. Verify the result
- Review the statuses and messages on the reader page; a pending stage does not confirm that the others have finished.
- Under Personnel, check each person’s synchronization result and address any messages.
- When the reader and employees are ready, make an authorized test check and verify that it appears under Recent events or View all.
If the reader does not appear connected, check its connection and configuration. If registration failed, consult the message on the page and use More actions → Retry registration when appropriate.